usb7
small usb devices
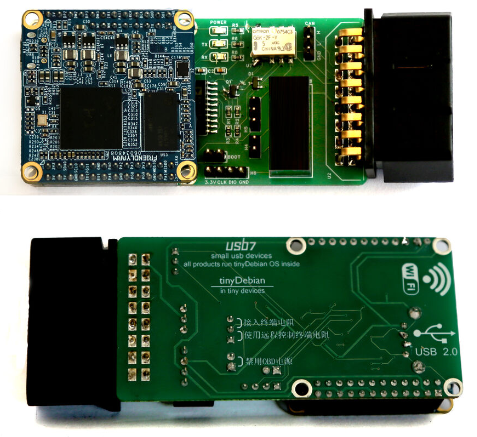
CAN/OBD board
CAN/OBD board is development board with the feature of accessing it remotely.
- Designed to interact with cloud by writing Python, C++ and Rust code. Debian 12 and Python 3.11 running environment.
- Can be powered via a vehicle's OBD Port.
- Typical application is to write C++ code to receive CAN signals from vehicle's OBD port, decode/encode CAN signals and write Python code to interface with cloud and upload received CAN signals to cloud. Our example source code is: https://github.com/usb7/CAN-demo-python
- Remote access makes it easier to debug software when it is installed on a vehicle.
- We have market-tested C++ code to read CAN data from OBD/CAN interface and decode/encode using DBC file.
Hardware specification
- Based on NanoPi Neo Air which is Allwinner H3 - quad-core ARM Cortext-A7 CPU, 512MB DDR3 RAM, 8GB eMMC, and 2.4GHz WiFi.
- CAN/OBD interface
- Can be powered via a vehicle's OBD Port.
- Runs our tinyDebian OS which is Debian 12.
Configure WiFi and register
Quick test
sudo apt update
sudo apt install can-utils
sudo ip link set can0 up type can bitrate 500000
sudo ip link set up can0
# send CAN signals to can0 interface, CAN ID is 123, data is DE AD BE EF
cansend can0 123#DEADBEEF
# receive CAN signals from can0 interface
candump can0
# write received CAN signals into log file
candump can0 -l logfile.log
# download file from CAN board
sz logfile.log
# upload file to CAN board
rz
Reference
- Schematics
- Detailed information about NanoPi Neo Air: